Configuring Administrative Preferences
This page is available to both master and tenant administrators to manage run-time activities not related to application development.
Navigate to Administration > Setup Home > Administration Setup > Preferences.
Within this page, you can define the following preferences:
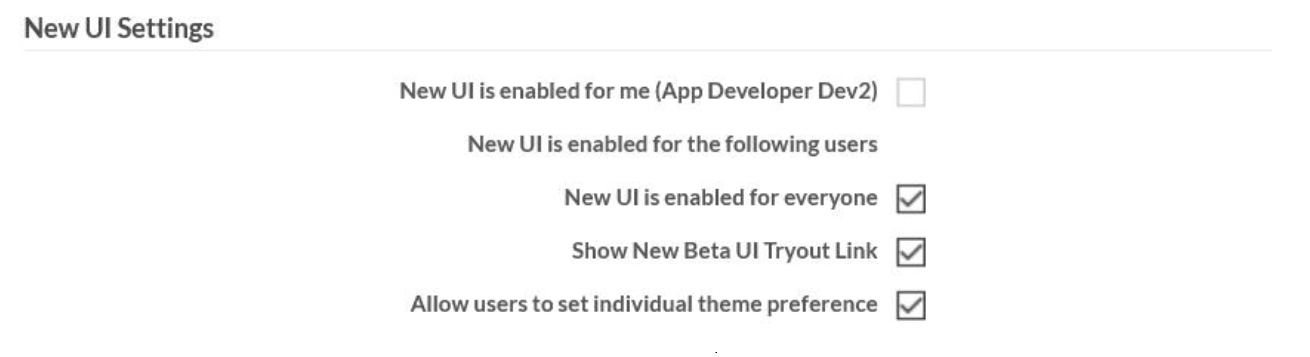
Classic UI Settings
This section displays settings that are specific to the Classic UI, which an administrator might want enable for the user(s).
- Allow users to set individual theme preference: As this preference
indicates, select this preference so that all users, including
non-administrative users, can select a theme to use for all applications,
regardless of the theme chosen for each application by an administrator.
Themes are only available in the Classic UI. For more information about themes, see Working with themes and Selecting a theme for a user for more information.
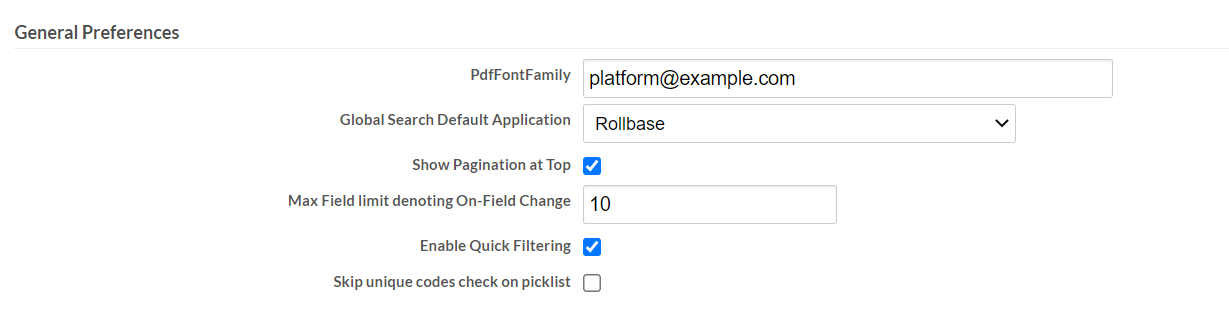
General preferences
- PdfFontFamily: Add and configure more fonts to support different
languages (For eg- Droid Sans Fallback for Chinese). You can update the
value of this field with desired fonts. If a preferred font value is
specified, it will be used to generate the pdf. Alternatively, if a
preferred font value is not specified, then the value specified in the Shared
Properties will be used.
The font-family mentioned in this field is considered as the default font. Lato, Helvetica, Arial, Tahoma and sans-serif are available as default fonts.
- Global Search Default Application: By default, the global search is set to search within all objects. From the Global Search Default Application dropdown, select the application to be set as default to search the objects within. Once selected, the application is shown as default in the Global search filter drop down.
See Application Search for more information.
-
Show Pagination at Top: Shows a pagination control in the list view on the top for all users. This property is managed by the administrator. If enabled by the System Administrator, Tenant Administrators cannot disable this property.
-
Max Field limit denoting On-Field Change: Set a limit on the number of fields which can be selected from Available Fields for the On Field Change property. By default, the limit is set to 10. See Trigger rules and restrictions for more information.
-
Enable Quick Filtering: Enables the users to instantly filters the data using the fields in the list view of application runtime page. See Quick Filters for more information.
-
Enable Rate Limits: Enables the tenant users to create, edit, or delete rate limit profiles at the tenant level. See Rate Limit, for more information.
-
Skip unique codes check on picklist: Skips validating duplicate integration code as Labels or picklist values remain unique within picklist fields. When enabled, any integration code associated with the picklist values are no longer reiterated and thus no error is thrown for duplicate or improper entries.
This property is governed by the Master Tenant. If for any reason, it is enabled across the instance, the Tenant administrator cannot disable this property. See Picklist Field for more information.
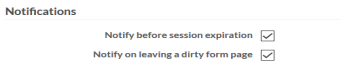
Notifications
- Notify before session expiration:: You can configure
whether session expiration notifications are sent at both the tenant and the
user level. By default, the user settings is the same as the tenant setting.
However, after you change the setting at the user level, that setting takes
precedence for you; if an administrator changes the tenant setting, it has
no effect on the user setting.
- The maximum inactive period after which a session will timeout and expire
- The maximum allowed session time after which a session expires and the user must re-login
- Tenant level — From Setup Home, click Preferences under Administration Setup. Notify before session
expiration is selected by default. Deselect this
to turn off notifications at the tenant level.
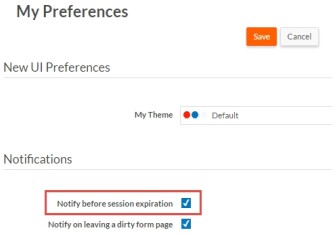
- User level — From the user profile menu, select
My Profile and then
select My Preferences.
Notify before session
expiration is selected by default. Deselect this
to turn off notifications at the user level.
On Platform Private Cloud, the default session times are configurable for each security level by modifying the following properties in the configuration file securityLevel.xml:
inactiveSessionExpireMinsloginSessionExpireMins
See Built-in security levels for details.
The method
hasSessionExpired()returnstrueif the user session has expired and returnsfalseif the user session has not expired.Note: This behavior is only available for users who are using the Classic UI. It is not available on setup and administrative pages. - Notify on leaving a dirty form page: Select this option to configure so that Platform will notify you before a session expires and/or before leaving a dirty form (New, Edit) page: If either of these options is deselected, you will not receive that type of notification.
Email Settings
When an administrator adds a new user to a Platform tenant, Platform automatically sends a welcome email to the user's email address. A new tenant-level preference allows administrators to suppress welcome emails for new users, also known as silent onboarding. This preference is available on both hosted Platform and Platform Private Cloud. It is particularly useful for Private Cloud tenants that use SAML or Kerberos for authentication.

Dynamic Image Resize Settings
The smart image feature provides automatic resizing of images:
- Select Enable resizing and storing images for different device form factors to specify a maximum size in Image Upload field properties, so that Platform automatically resizes images when users upload them.
- Enable a dynamic image preference that causes Platform to automatically store images that are 992px or wider in four pre-defined widths (992px, 768px, 480px, and 50px) and to render the appropriate image. For example, on record list pages, Platform uses the smallest image, but for view pages and pages that display cards, Platform uses the image closest to but smaller than the device. The dynamic image preference applies to all apps in a tenant. Images narrrower than one or more of the pre-defined widths will be stored in the original size and the narrower widths. For example, an image with a width of 500px would be stored at 500, 480, and 50.
-
To have Platform automatically resize images on upload, use the Image Upload field property Maximum Image Size and specify a value in pixels under Shared Properties > Images. For landscape images, Platform applies the maximum size to the width. For portrait images, Platform applies the maximum size to the height. When Maximum Image Size is specified, Platform ignores the Maximum File Size property. Platform resizes images only if they are larger than the specified value.

Logging Preferences
This section displays settings that are specific to the logging, which is available for both MASTER and TENANT administrator(s). This functionality is governed by EnableCustomLogging shared property.
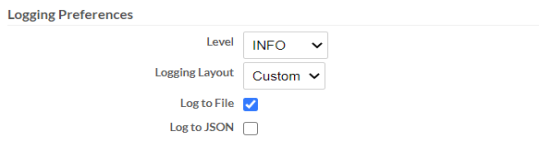
- Level: By default, the logging level is set to Default. From the Level dropdown, select the preferred logging level to log files for debugging. The following levels of logging are available for selection in the Level dropdown.
Default: For MASTER users, this option logs all the INFO messages corresponding to normal application behavior, basically providing a skeletal information of what occurs.
For TENANT admins, the Default option logs the level as set by the MASTER. TENANT admin can override the MASTER's setting by selecting any other preferred logging level.
- Other
log4jlogging levels available for selection are OFF, FATAL, ERROR, WARN, INFO, DEBUG, TRACE and ALL.
- Logging Layout: By default, the logging layout is set to Default. From the Logging Layout dropdown, select the preferred logging layout. The following layouts of logging are available for selection in the Logging Layout dropdown.
Default: In the Default logging layout, Log to File is set as preset and the logs are saved in a standard format.
Custom: In the Custom logging layout, the user can define to log the files by selecting either of Log to File and Log to JSON, or both.
For TENANT admins, the Default option logs in the layout as set by the MASTER. TENANT admin can override the MASTER's setting by selecting the Custom layout.
-
Log to File: All logs are saved in standard format. The log files are available in following location. This option can only be selected if the logging layout is set to Custom.
<ROLLBASE_HOME>/Storage/<CustID>/log -
Log to JSON: All logs are saved in JSON format. The log files are available in following location. This option can only be selected if the logging layout is set to Custom. These JSON formatted log files can be viewed in the UI if only Log to JSON is selected.
<ROLLBASE_HOME>/Storage/<CustID>/logJSONNote: The above mentioned paths can change according to the the log directory defined in the node-config.json file.
Authentication Settings
This section displays settings specific to account authentication, which is available for both MASTER and TENANT administrator(s). The following settings of authentication are available for selection in this section.
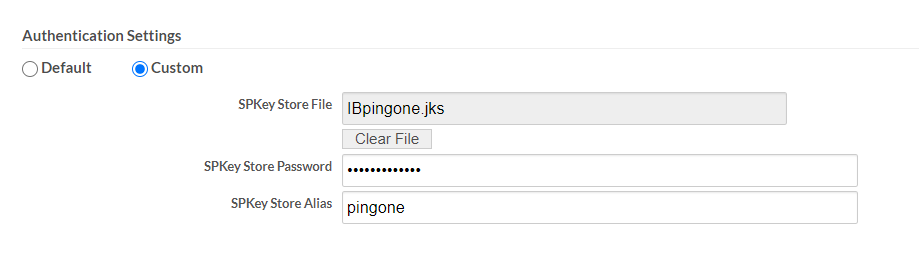
- Default: By default, the Authentication Settings is set to Default. In the Default setting, the authentication configured by the MASTER in the control panel is preferred.
-
Custom: In the Custom setting, the TENANT administrator can configure the authentication on per tenant level. If not configured, the authentication falls back to the settings configured at the MASTER administrator level.
Specify the values for the following fields in Authentication Settings section when set to Custom:
Custom Authentication Settings Description SPKey Store File The name of the key store. In the prerequisite steps example, InfiniteBlue.jks.. This value can be edited by the TENANT administrator. SPKey Store Password The key store password. In the prerequisite steps example, this is myPassword.SPKey Store Alias The key store alias. In the prerequisite steps example, this is server.
For more information on authentication settings, see the authentication configuration section in the Control Panel.
Java Script Engine Settings
This section displays settings specific to Java Script Engine, which is available for both MASTER and TENANT administrator(s). The following setting of java script engine is available for selection in this section.

Enable ECMAScript 6 (ES6) features: This option is set to false by default. When set to true, the ES6 features are available for server-side scripting. The upgraded Rhino JS engine supports key ES6 features, such as: Arrow functions, Promises, Destructuring assignment, let and const variable declarations, etc.