How to map a request
To map the Decision Service request:
- From the New Trigger
screen, click Configure in the Corticon Configuration area.
Note: You must configure acces to one or more Corticon Servers before performing this step. See Configuring Platform to access Corticon Server for details.The mapping tool opens and displays a list of Decision Services available on the configured Corticon Server.
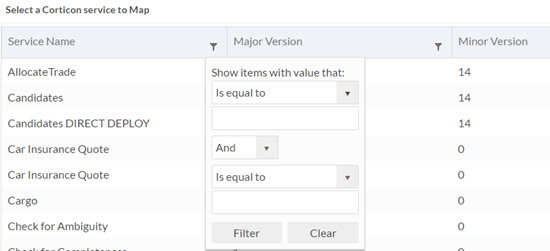
- Select the Decision Service you want to invoke from the list of
services. To locate the service, click the filter button next to Service Name, Major
Version, or Minor Version
and enter a filter condition.
- After selecting the service, click Next.
The Input/Output mappings screen opens, displaying Platform objects and fields on the left and Corticon entities, and attributes on the right. By default, the Request tab is selected, allowing you to map fields for the request.
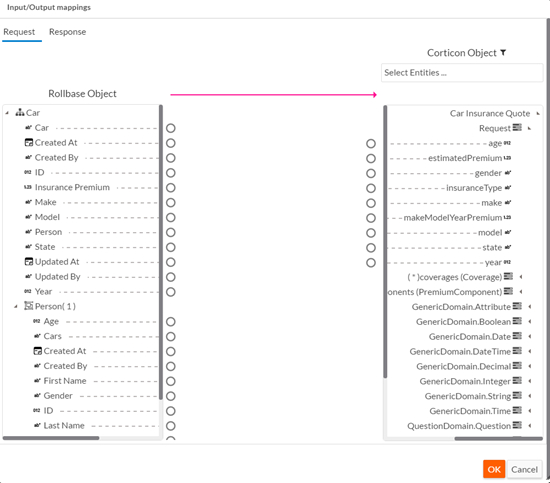
- Optionally filter the list of Corticon entities by clicking the filter icon next to Corticon Object and selecting the entities required for the mapping.
- To map a field, select a circle next to a Platform field and drag the arrow that
appears to a circle next to a Corticon attribute. Note that you can only map fields
and attributes, not objects and entities.
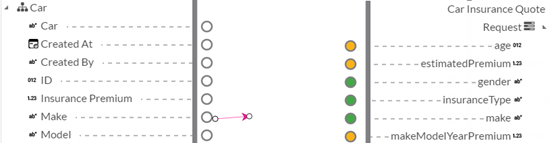
As you drag the arrow, the circles next to the Corticon attributes change color, indicating the data types are compatible. Attributes that do not require conversion display green circles and fields that require conversion display orange circles as shown below. When you map to a attribute that requires conversion, the conversion will display above the arrow when it is selected. Attributes that display red circles have incompatible data types and you cannot map to them. See Supported data types and conversions for a complete list of supported data types and conversions.
- When you have finished mapping, click OK to exit the mapping tool or click Response to map the response. If you exit the visual mapper, you will need to open it again to map the response.