External Hazelcast Deployment for Platform Private Cloud
This section describes how to configure Platform Private Cloud to use Hazelcast running on an independent JVM. In this configuration, Hazelcast runs separately from the Platform Tomcat JVM, which helps isolate cache services from application services and allows Hazelcast to be managed independently. This setup can help improve scalability, simplify maintenance activities, and reduce the impact of application server restarts on distributed cache operations.
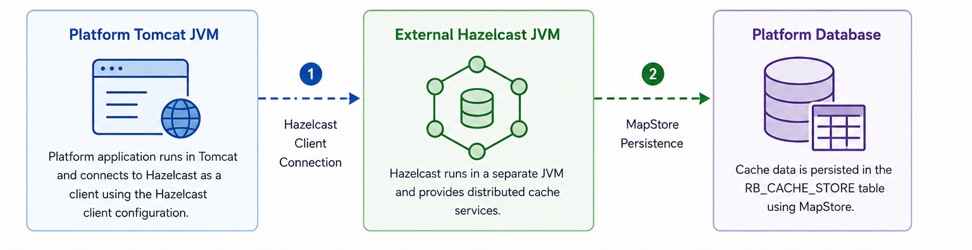
Before you begin, ensure that you have access to the Platform installation directory, the Platform database, and the <ROLLBASE_HOME>\config directory.
Downloading and preparing Hazelcast
To download and prepare Hazelcast:
-
Download Hazelcast Community Edition 5.4.0 from the following location:
https://github.com/hazelcast/hazelcast/releases/download/v5.4.0/hazelcast-5.4.0.zip
-
Extract the ZIP file to access its contents.
For example: <HAZELCAST_HOME>\
Copying required JAR files
Copy the following JAR files to the Hazelcast user-lib directory. For example, the path might be <HAZELCAST_HOME>\bin\user-lib.
| JAR File | Path for the JAR file |
|---|---|
|
commons-fileupload-1.5.jar |
<ROLLBASE_HOME>\lib |
|
encoder-1.3.1.jar |
<ROLLBASE_HOME>\lib |
|
jackson-annotations-2.20.jar |
<ROLLBASE_HOME>\lib |
|
jackson-core-2.20.0.jar |
<ROLLBASE_HOME>\lib |
|
jackson-databind-2.20.0.jar |
<ROLLBASE_HOME>\lib |
|
mysql-connector-java-8.0.11.jar |
<ROLLBASE_HOME>\lib |
|
rb_core.jar |
Any WAR file's WEB-INF\lib directory |
|
rb_master.jar |
Master WAR file's WEB-INF\lib directory |
|
rb_util.jar |
Tomcat's lib directory |
|
servlet-api.jar |
Tomcat's lib directory |
Configuring Hazelcast maps
-
Edit the Hazelcast configuration file.
For example: <HAZELCAST_HOME>\config\hazelcast.xml
-
Add the following map configuration:
Copy<map name="rb-shared-props-cache">
<map-store enabled="true" initial-mode="EAGER">
<class-name>com.rb.util.engine.services.cache.mapstore.GenericCacheMapStore</class-name>
<write-delay-seconds>45</write-delay-seconds>
<write-batch-size>100</write-batch-size>
<write-coalescing>true</write-coalescing>
<properties>
<property name="map.name">rb-shared-props-cache</property>
</properties>
</map-store>
</map>
<map name="rb-database-info-cache">
<map-store enabled="true" initial-mode="EAGER">
<class-name>com.rb.util.engine.services.cache.mapstore.GenericCacheMapStore</class-name>
<write-delay-seconds>45</write-delay-seconds>
<properties>
<property name="map.name">rb-database-info-cache</property>
</properties>
</map-store>
</map>
<map name="rb-node-attribute-info-cache">
<map-store enabled="false"/>
</map>
<!-- Transient runtime map. MapStore persistence is not required. -->
<map name="rb-dist-lock-cache">
<backup-count>1</backup-count>
</map>
<map name="rb-license-info-cache">
<map-store enabled="true" initial-mode="EAGER">
<class-name>com.rb.util.engine.services.cache.mapstore.GenericCacheMapStore</class-name>
<write-delay-seconds>45</write-delay-seconds>
<properties>
<property name="map.name">rb-license-info-cache</property>
</properties>
</map-store>
</map>
<map name="rb-component-info-cache">
<map-store enabled="false"/>
</map>
<map name="rb-security-level-cache">
<map-store enabled="true" initial-mode="EAGER">
<class-name>com.rb.util.engine.services.cache.mapstore.GenericCacheMapStore</class-name>
<write-delay-seconds>45</write-delay-seconds>
<properties>
<property name="map.name">rb-security-level-cache</property>
</properties>
</map-store>
</map>
<map name="rb-service-level-cache">
<map-store enabled="true" initial-mode="EAGER">
<class-name>com.rb.util.engine.services.cache.mapstore.GenericCacheMapStore</class-name>
<write-delay-seconds>45</write-delay-seconds>
<properties>
<property name="map.name">rb-service-level-cache</property>
</properties>
</map-store>
</map>
<!-- Dynamic maps with LAZY loading. -->
<map name="rb-*-cache">
<map-store enabled="true" initial-mode="LAZY">
<class-name>com.rb.util.engine.services.cache.mapstore.GenericCacheMapStore</class-name>
<write-delay-seconds>45</write-delay-seconds>
<write-batch-size>100</write-batch-size>
<write-coalescing>true</write-coalescing>
</map-store>
<time-to-live-seconds>0</time-to-live-seconds>
<max-idle-seconds>0</max-idle-seconds>
<eviction eviction-policy="LRU" max-size-policy="USED_HEAP_PERCENTAGE" size="80"/>
</map>
<listeners>
<listener>com.rb.util.engine.services.cluster.hazelcast.HazelcastClientListener</listener>
</listeners>
Creating the cache store table
Create the RB_CACHE_STORE table in the Platform database to support cache data persistence and retrieval. For new installations, the table is created as part of the database creation scripts (for example, create_mysql.sql). For existing installations, apply the schema updates provided in the appropriate update_<platform_version>.sql script for your database platform.
Updating the Hazelcast startup file on Windows
To configure the Hazelcast startup file,
On Windows:
-
Open the hz-start.bat file from the Hazelcast bin directory.
For example: <HAZELCAST_HOME>\bin\hz-start.bat
-
Update the Hazelcast configuration location and database connection values for your environment.
-
Append the following configuration to the startup file:
set HAZELCAST_CONFIG=<HAZELCAST_HOME>\config\hazelcast.xml
set CACHE_DB_URL=jdbc:mysql://localhost:3306/IB_BCIC
set CACHE_DB_USER=root
set CACHE_DB_PASSWORD=password

set "JAVA_OPTS=%JAVA_OPTS%
-Dhazelcast.config="%HAZELCAST_CONFIG%"
-Dlog4j.configurationFile="<HAZELCAST_HOME>\config\log4j2.xml"
-Dlog4j2.debug=true"

"%RUN_JAVA%" %JAVA_OPTS% -cp "%CLASSPATH%" "com.rb.util.engine.services.cluster.hazelcast.ExternalHazelcastServiceStarter" "%HAZELCAST_CONFIG%"
On Linux:
-
Open the hz-start.sh file from the Hazelcast bin directory.
For example: <HAZELCAST_HOME>/bin/hz-start.sh
-
Update the Hazelcast configuration location and database connection values for your environment.
-
Append the following configuration to the startup file:
Copyexport HAZELCAST_CONFIG=<HAZELCAST_HOME>/config/hazelcast.xml
export CACHE_DB_URL=jdbc:mysql://localhost:3306/IB_BCIC
export CACHE_DB_USER=root
export CACHE_DB_PASSWORD=password
export JAVA_OPTS="$JAVA_OPTS \
-Dhazelcast.config=$HAZELCAST_CONFIG \
-Dlog4j.configurationFile=<HAZELCAST_HOME>/config/log4j2.xml \
-Dlog4j2.debug=true"
exec "${JAVA}" -cp "${CLASSPATH}" ${JAVA_OPTS} \
com.rb.util.engine.services.cluster.hazelcast.ExternalHazelcastServiceStarter \
"$HAZELCAST_CONFIG"
If you use the log4j2.xml file provided with this topic, copy it to the Hazelcast config directory.
For example: <HAZELCAST_HOME>\config
Starting Hazelcast
To start Hazelcast, follow these steps to ensure a successful launch:
-
Open a command prompt window on your computer to enter the commands.
-
Change your current directory to the Hazelcast directory. This is where the startup scripts are located.
For example, use the following path: <HAZELCAST_HOME>\bin
-
Run the appropriate startup script to launch Hazelcast.
-
On Windows, execute: hz-start.bat
-
On Linux or UNIX systems, run: hz-start.sh
-
-
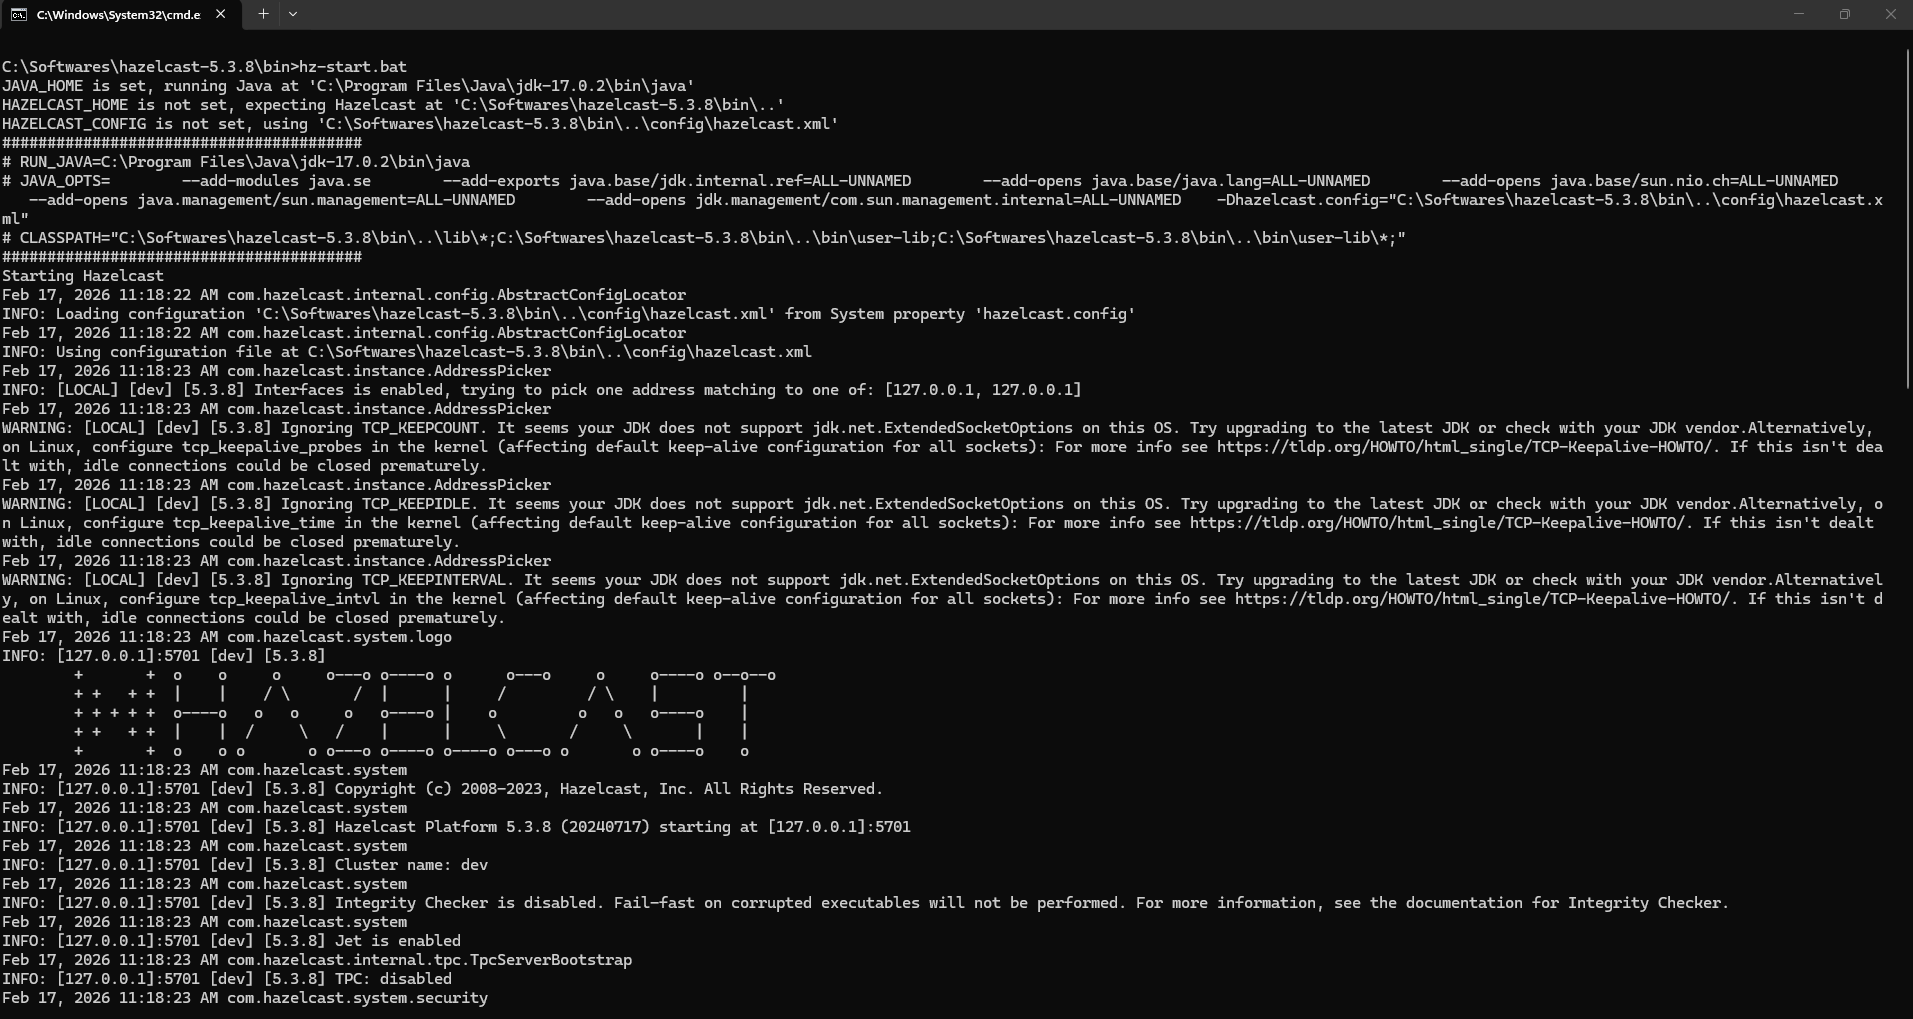
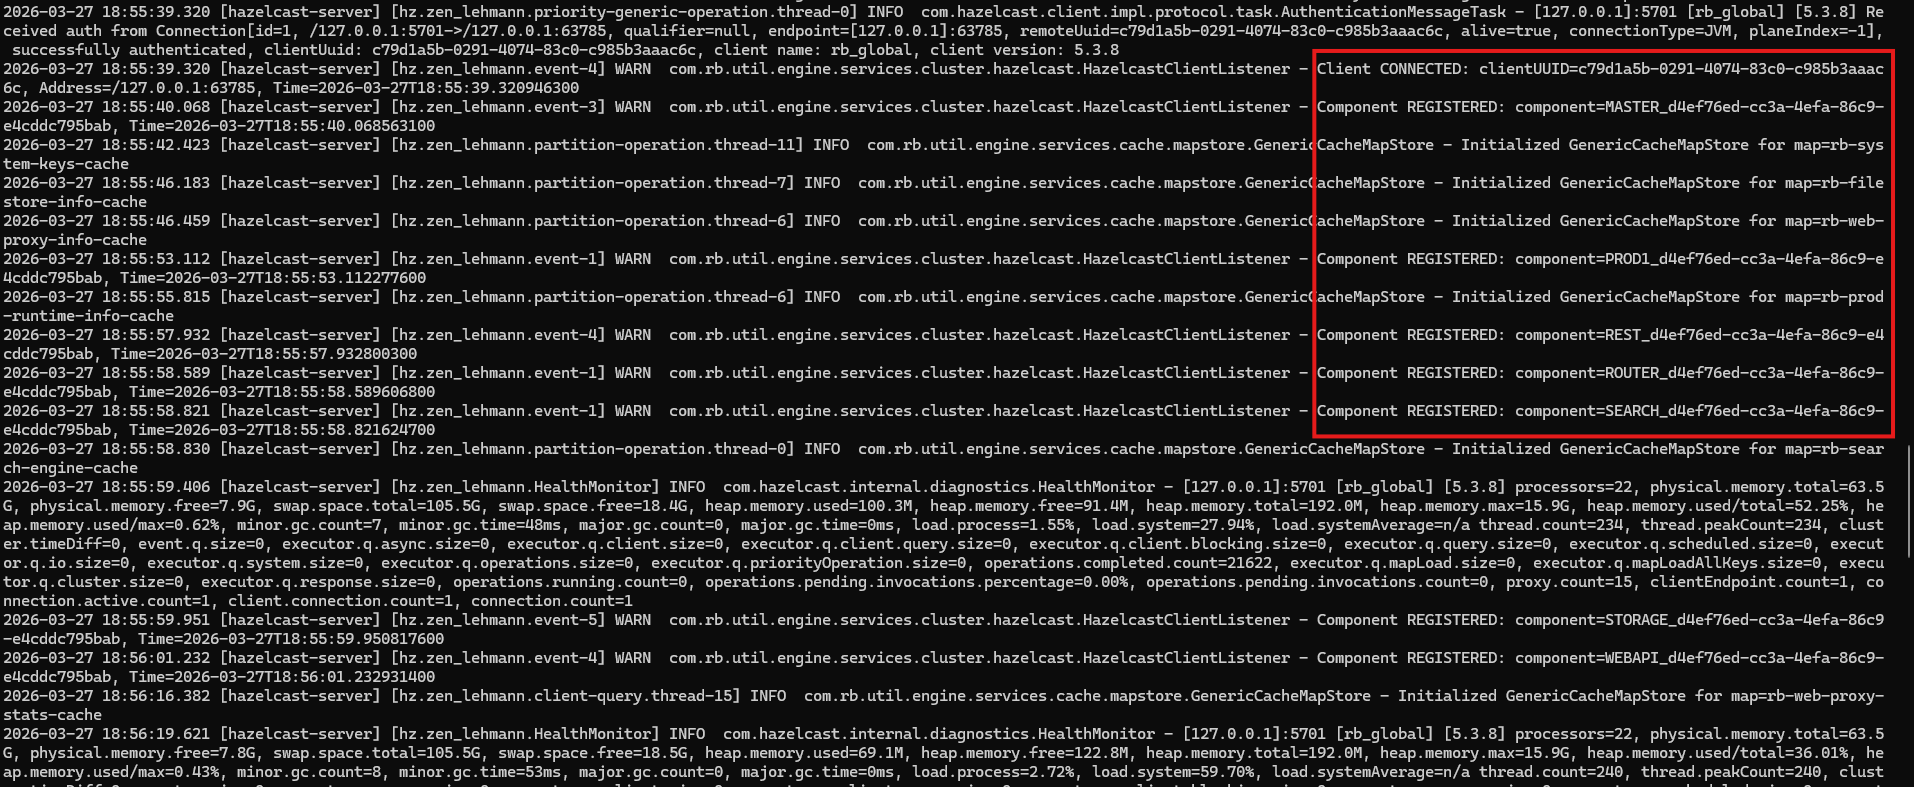
Review the console output to confirm Hazelcast started without errors. This step ensures the service runs properly.
Configuring Platform to use external Hazelcast
To configure the Platform to connect to the external Hazelcast instance:
-
Copy this hazelcast-client.xml file to the Platform <ROLLBASE_HOME>\config directory.
-
Open the node-config.json file.
-
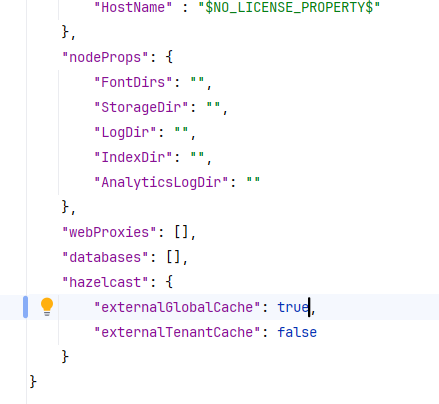
Add the following property:
Copy"hazelcast" : {
“externalGlobalCache" : true
}For example:
-
Save the node-config.json file.
Starting Platform
After Hazelcast has fully started and is running smoothly, proceed to start the Platform Tomcat server to ensure all components are properly initialized in sequence.
Starting Hazelcast Management Center
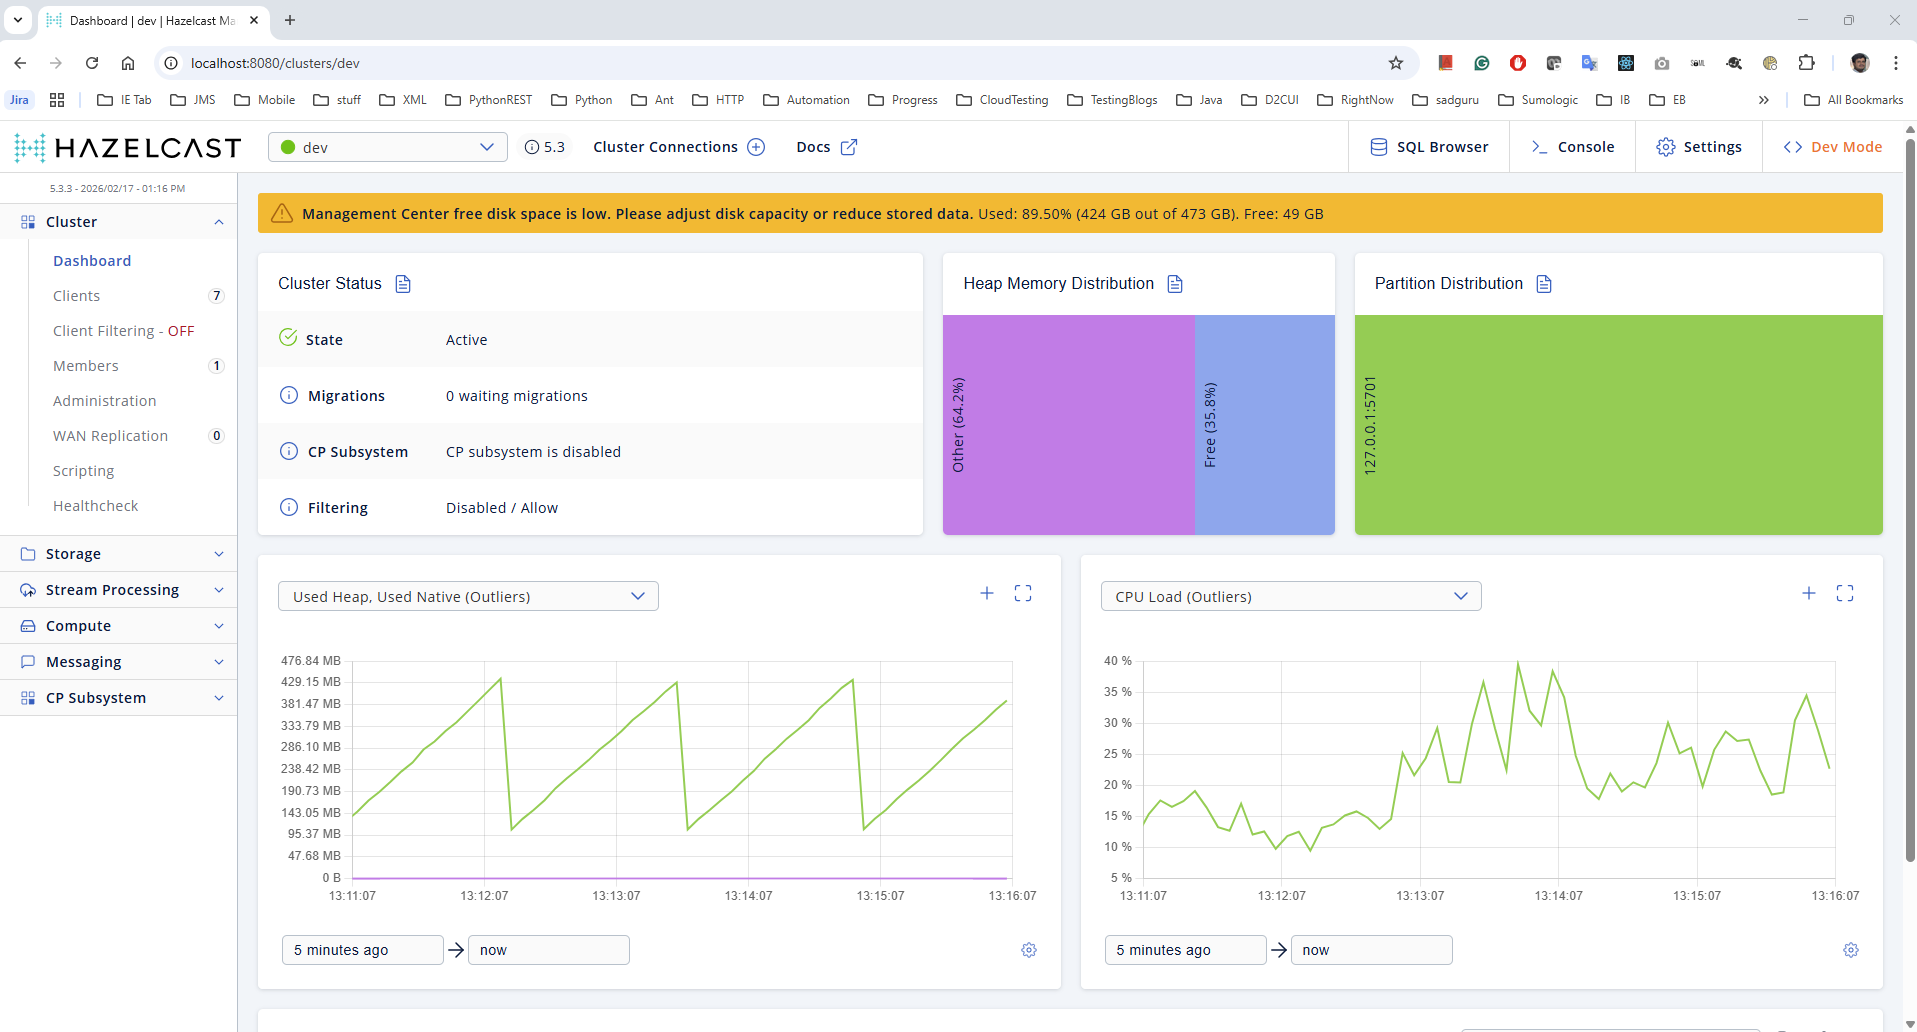
Optionally, you can start the Hazelcast Management Center by executing the command mc-start.cmd which is located in the Management Center's bin directory. This step is not mandatory but can be performed if you wish to manually launch the Management Center.
For example: <HAZELCAST_HOME>\management-center\bin\mc-start.cmd.