Create a trigger using REST Hook dynamic URL Trigger Type
In this method, Zapier generates a REST Hook dynamic URL. The user can post any request to the generated REST Hook dynamic URL from Platform using Object Script or HTTP Post trigger. With Static Webhooks, you need to copy and paste a specific URL to connect your application and ZAP. In contrast, this is controlled automatically between Zapier and your application with the REST hooks. For more information on REST Hooks, see How to Use REST Hooks in Zapier CLI.
To sum-up this process, with the ZAP turned on, the subscribeHook function is called, enabling you to POST the URL which will be stored and triggered in the ZAP. Whereas, with the ZAP turned off, the unsubscribeHook function is called, enabling you to DELETE the URL which was previously stored and used in the ZAP.
-
Create a trigger and enter the required details in the Settings tab of the Trigger form. When done, click Save and Continue.

-
Now, navigate to Input Designer tab.
- Add a User Input Field as Email.
- Add a User Input Field as Sample Output JSON.
- Click Save.

-
Now, navigate to API Configuration tab.
-
In the Configure your API Request section:
- Select Trigger Type as REST Hook.
-
Switch to Code Mode in the Subscribe section and paste the below code.
Platform has inbuilt REST APIs to fulfill the Zapier Subscription requirements. You can simply develop an application with the Subscription object to store the REST Hook dynamic URL & Email Address. Then, add an Email trigger to send the REST Hook dynamic URL to the prescribed Email Address.Copyconst options = {
url: 'https://<HOST_NAME>/master/api2/data/subscription',
method: 'POST',
headers: {
'Content-Type': 'application/json',
'Accept': 'application/json',
'api-key': "<API-Key>"
},
params: {
},
body: {
'hookUrl': bundle.targetUrl,
'email' : bundle.inputData.email
}
}
return z.request(options)
.then((response) => {
response.throwForStatus();
const results = response.json;
return results;
});Modify the <HOST_NAME and <API-Key value to your actual Host Name and API-Key respectively.
-
Switch to Code Mode in the Unsubscribe section and paste the below code.
Consider the Unsubscribe function as beta with the below code being represented as a reference. To further understand it's requirements and develop the Platform REST API to fulfill the requirements, see Zapier's documentation on Unsubscribe function.Copyconst options = {
url: 'https://<HOST_NAME>/master/api2/data/subscription',
method: 'DELETE',
headers: {
'Content-Type': 'application/json',
'Accept': 'application/json',
'api-key': "<API-Key>"
},
params: {
'recordIds': bundle.subscribeData.id
},
body: {
'hookUrl': bundle.subscribeData.id
}
}
return z.request(options)
.then((response) => {
response.throwForStatus();
const results = response.json;
return results;
});Modify the <HOST_NAME and <API-Key value to your actual Host Name and API-Key respectively.
-
Switch to Code Mode in the Perform List section and paste the below code.
Copyvar result = JSON.parse(bundle.inputData.sample_json_ouput);
return [result];
-
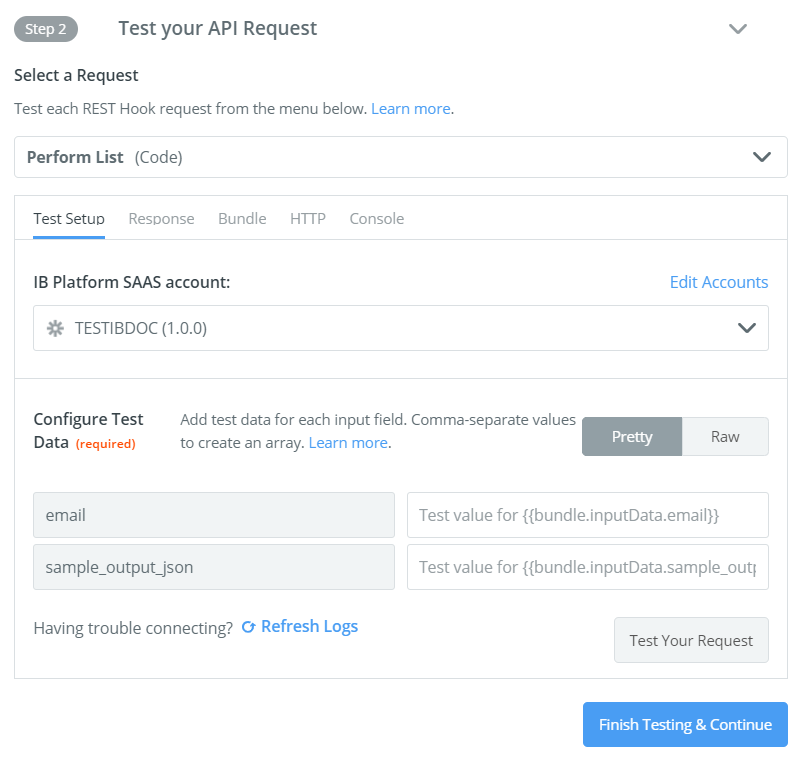
In the Test your API Request section:
-
Select Perform List from the Select a Request dropdown.
-
You are prompted to Sign in to Infinite Blue Platform account to test your Authentication. If you are already signed, select the existing account.
-
Enter the test values for Email and Sample JSON Output input fields to test the request.
- When done, click Test Your Request. On successful request, click Finish Testing & Continue.
-
-
In the Define your Output section
-
If needed, Generate Output Field Definitions and Add Output Fields
-
Or you can skip to click Save Output & Finish.
-
You have now successfully created a trigger using REST Hook dynamic URL trigger type.