Metadata Cache Logging
Platform6.9 allows administrators to implement the Metadata Cache Logging which is designed to assist debugging by enabling on-demand detailed logging. This feature provides deeper insights into the Metadata Cache operations, aiding in the identification and resolution of issues more effectively.
Enabling Metadata Cache Logging
To enable the Metadata Cache Logging:
-
Navigate to the System Console > Monitoring > Debug > Metadata Cache Logging.
-
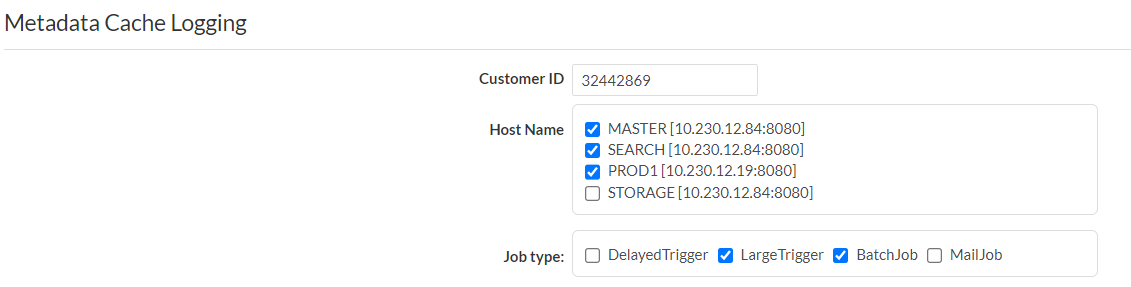
Under the Metadata Cache Logging section, configure the following parameters to enable the on-demand logging:
-
Customer ID: Enter the Customer ID for which detailed logging should be enabled. Multiple Customer IDs can be added, separated by commas.
-
Host Names: Choose the preferred host names from the available options: MASTER, SEARCH, PROD, or STORAGE.
-
Job Types: Choose the preferred job types from the available options: Delayed Trigger, Large Trigger, Batch Job or Mail Job.
-
-
Click Save.
Note:
Enabling the metadata cache logging may result in reduced performance for the affected threads due to the higher volume of data being processed. Be sure to disable metadata cache logging once debugging activities have concluded.
Metadata Cache Logging settings are applied at runtime and do not persist after the instance is restarted. Ensure the settings are enabled to debug cache logging.
Viewing Metadata Cached Log Files
To view the metadata cached log files:
-
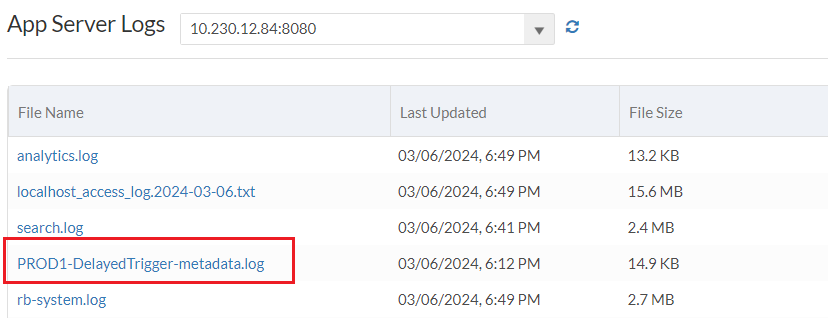
Navigate to the System Console > Monitoring > System Logs > App Server Logs.
-
Select the Host Name. The page should display the App Server logs for the selected hostname.
-
Within this section, find the log files named following a specific pattern:
PROD1-DelayedTrigger-metadata.log
-
To locate your specific logs, make the following replacements in the file name pattern:
-
Replace
PROD1withMASTER,STORAGE, orSEARCH. -
Replace
DelayedTriggerwith the job type selectionLargeTrigger,BatchJob, orMailJobto find logs relevant to specific jobs.
-