Importing for existing objects
Before importing, be sure to understand the requirements and how import works, as described in Importing data.
To import a spreadsheet or CSV file to create new records, update existing records, or delete records, follow these steps:
- Navigate to the tab or view of the object you want to import.
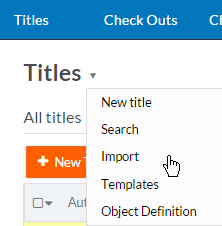
- From the page menu, select Import:
- Click Choose File to select an Excel Spreadsheet (.XLS or .XLSX) or a comma separated value (CSV) file location.
- If you selected a CSV file, specify its File
Encoding format and CSV File
Separator.
Note: By default, the file encoding is ISO-8859-1 and the file separator is a comma.
- Choose the appropriate action for creating and/or updating records.
- If you selected any action other than Create new records,
select a Unique field from the drop-down list.
The value in this field will be used to ensure that the correct record is modified.
- Click Next.
- Map the fields of the destination object to columns in the
uploaded spreadsheet by selecting the desired spreadsheet column from the
drop-down list on the right of each field. Platform makes a best guess at
automatically selecting field mappings based on the column headers in Row 1, but
it is up to you to verify and change mappings as needed.
-
Not mapped prevents the field from being populated.
-
Field default uses the default value set for new record creation. You must explicitly set this if you want to use default values.
Read-only fields do not participate in mappings. Fields with the attribute This field is required in all forms are highlighted in red and must be mapped to one of the spreadsheet columns to proceed. -
- Select the Import Mode:
-
Normal — Runs all triggers on creation of new records and creates picklist values while importing rows. This mode works best for medium-size imports.
-
Test — Limits your import to the first five records and displays a detailed report. Use this mode to test out your mapping before launching large imports.
-
Bulk — Optimized for faster processing of large imports. In this mode, triggers are not executed and new picklist values are not automatically created.
-
- Optionally,
-
Leave the Create new picklist items during import box checked if you want the system to create new picklist items during import. This box is checked by default, and is not available in bulk mode.
-
Leave the Exclude items to be added in picklist from import box checked if you want to restrict the scope of import to lookup possible picklist values from already entered list. With this, no new picklist option are created and assigned on the fly based on non-matching inputs from the import payload. Also, when checked at field level, no new picklist items are created during import.
- Click Save Map to use the same column to field mappings for other imports.
-
- Click Submit to start the import process. Files less than 20KB in size will be processed immediately and the results will display on-screen.